Spaces: overview and guides
Create a paid community and connect it to your store
In Merchavio your community is a product, just like a course or an ebook. You set the price, it gets its own sales page in your store, and whoever buys becomes a member straight away. When someone cancels, their access ends automatically.
Create a paid community in Merchavio
- Channels by topic, such as feed, announcements, wins, live calls and events, open to all members
- Paid monthly, annually or once, or free with just an email address
- A sales page in your own store, plus the Merchavio marketplace and your affiliate program if you like
- Free design in the community builder: one feed, channels and rooms or a card hub, with templates such as Classic Academy or Paid membership
- Live calls, events with an email when they start, a leaderboard by number of posts, roles and moderation
- Your own community rules: new members accept them in a pop-up before they see the content, and again whenever you change them
- Members can install the community on their phone as an app with your name and icon
The steps in Merchavio
Screenshots from Merchavio with sample data. The coloured frame shows where to click.
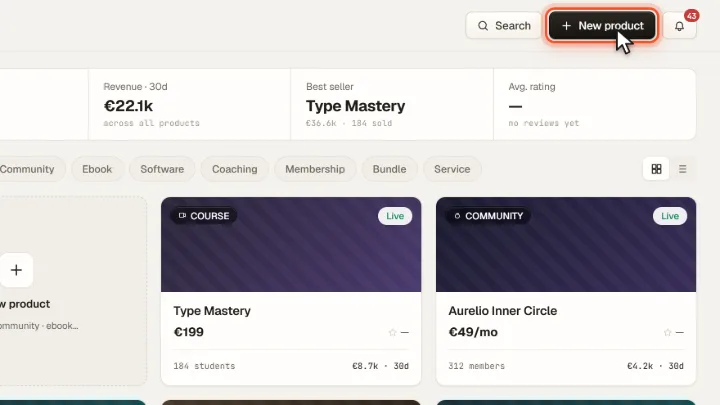
Create a new product
Open Products in the sidebar and click New product at the top right.
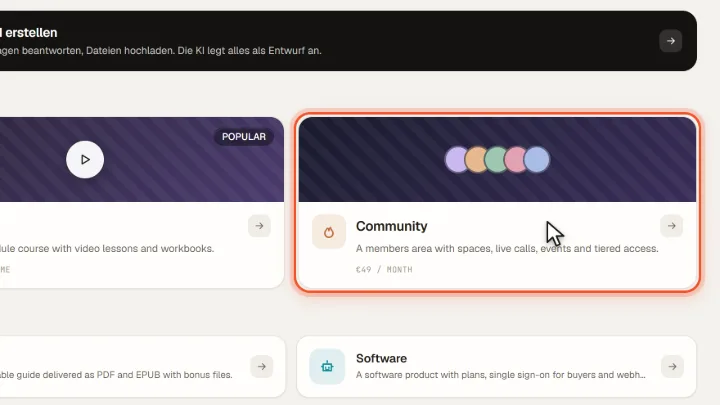
Choose the product type Community
Under Most popular, pick the Community card. Merchavio creates the community as a draft and opens the editor.
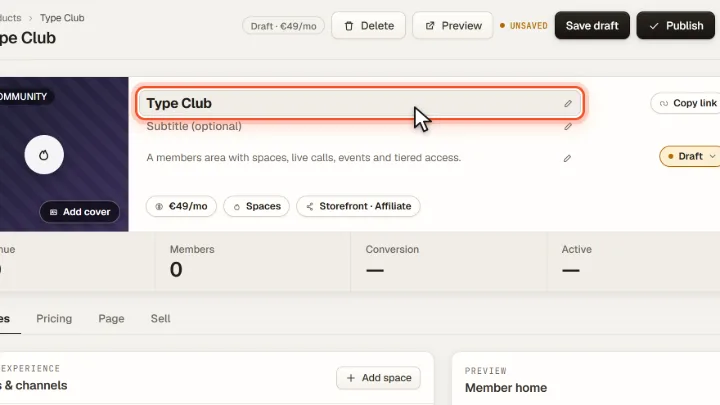
Name your community
Click the title and give your community a name. Below it is the description buyers see on the sales page.
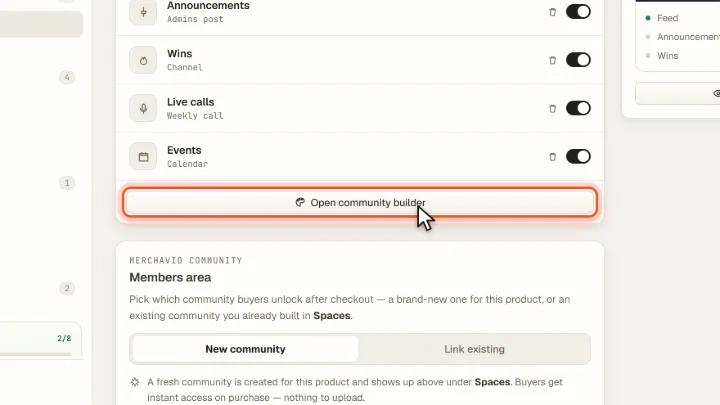
Set up the channels
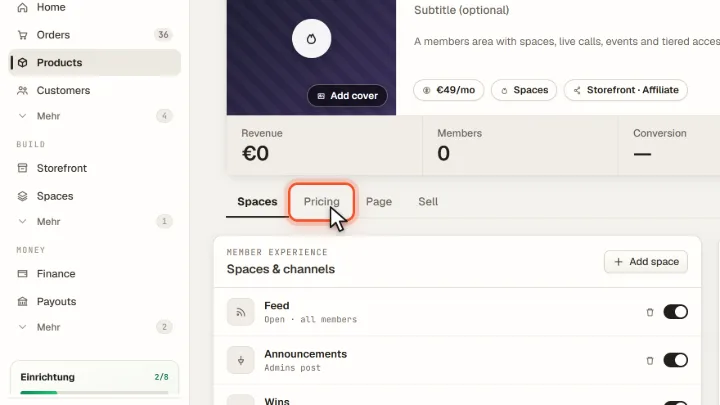
In the Spaces tab you switch channels such as feed, announcements or live calls on and off, or add new ones with Add space. Colours, layout and the start page are set in the community builder (Open community builder).
Open the pricing
Switch to the Pricing tab.
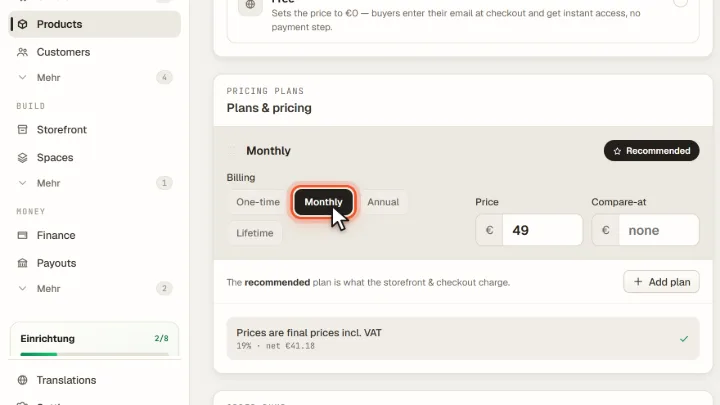
Set a monthly price
Keep Paid selected, choose Monthly under Billing and enter your price. On the right you see what buyers see at checkout.
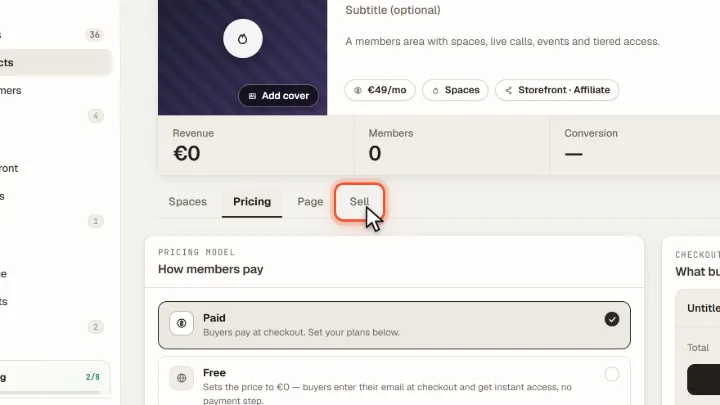
Open the sales channels
Switch to the Sell tab.
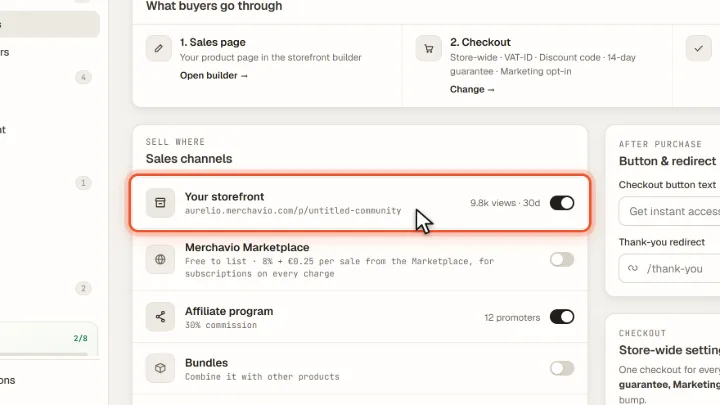
Sell it in your store
Under Sales channels, Your storefront is switched on: the community gets its own sales page in your store. You can also sell it in the Merchavio marketplace and through your affiliate program.
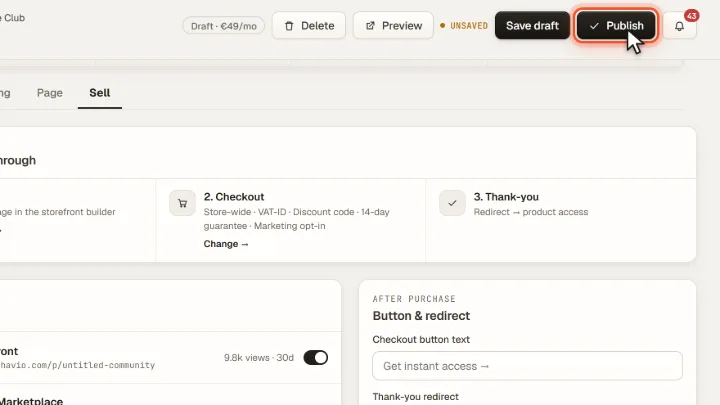
Publish
Click Publish at the top right. From now on buyers can purchase the community and become members automatically.
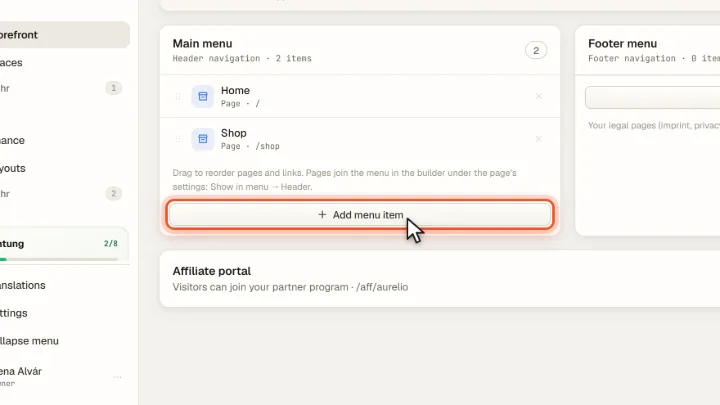
Add it to your store menu
So visitors find the community in your store: open Storefront, then Navigation, and click Add menu item under Main menu.
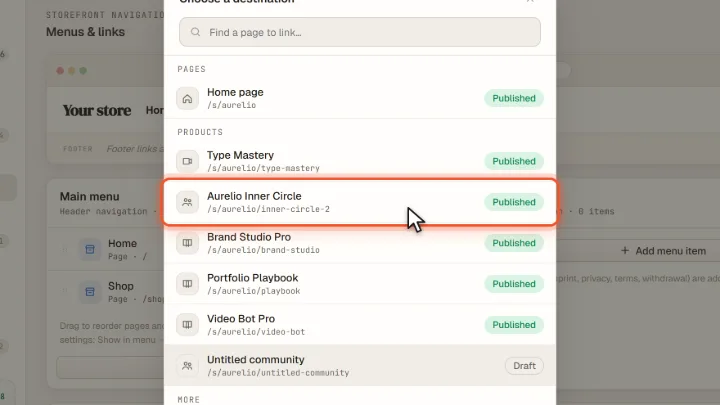
Choose your community
Pick your community under Products. It now appears in the menu at the top of your store.
Frequently asked questions
Can I offer a free community?
Yes. Choose Free in the Pricing tab: buyers then only enter their email address at checkout and get access straight away.
What happens when a member cancels?
When the subscription ends, access to the community ends automatically. Members can cancel without logging in using the cancellation button.
Can I sell a community together with a course?
Yes, as a bundle: under Products create a bundle with the community and the course, and buyers get both. Both live in the same store, and you can embed the course in the community as a block or channel.
Where does the money from memberships go?
Straight into your own Stripe account. Merchavio deducts the fee per sale automatically and never holds your money.